Unlock your creative potential in Roblox by learning how to create decals a fun way to personalize your game worlds and items. This comprehensive guide is tailored for the average US gamer balancing life and gaming providing practical easy to follow steps. Discover how to upload images navigate the Roblox Creator Dashboard and apply your custom decals to models giving your creations a unique touch. We address common pain points like moderation issues and image requirements ensuring a smooth experience. Whether you are looking to enhance your builds or share your artistic flair mastering decals is a valuable skill that adds depth and individuality to your Roblox journey. Stay current with best practices without the hype and optimize your in-game aesthetic efficiently making your gaming time more rewarding. Get ready to transform your Roblox experience with custom decals that reflect your style and creativity.
What is a Roblox Decal and How Does it Enhance My Game?
A Roblox decal is a 2D image asset that you upload to the Roblox platform and can then apply to various surfaces or parts within your game creations. Decals significantly enhance your game by allowing for deep personalization, custom branding, adding unique artistic elements, or even displaying informational graphics like signs and maps. For gamers, this means transforming generic builds into personalized masterpieces, making your virtual space truly yours.
How Do I Upload My Own Image as a Decal to Roblox?
Uploading an image as a decal to Roblox is a straightforward process. First, prepare your image ensuring it meets Roblox's community standards and is in a supported format like PNG or JPG. Then, navigate to the Roblox 'Create' page, select 'Decals' from the Creations menu, and click 'Upload Image'. Choose your prepared file, give it a descriptive name, and submit it for moderation. Once approved, your decal will appear in your inventory, ready for use.
What are the Key Image Requirements for Roblox Decals?
For optimal results and to avoid moderation issues, Roblox decals should ideally be in PNG format for transparency support, or JPG for photographs. While there is no strict maximum resolution, images around 512x512 or 1024x1024 pixels are commonly recommended for good balance between quality and performance. More importantly, all images must adhere to Roblox's Community Standards, avoiding inappropriate, copyrighted, or personally identifiable content to ensure quick approval and a smooth experience.
Why Did My Roblox Decal Get Rejected and How Can I Fix It?
Roblox decals are typically rejected due to violations of community standards, most commonly involving inappropriate content, copyright infringement, or personal information. If your decal is rejected, carefully review your image against Roblox's rules. Edit the image to remove any offending material—for instance, replace copyrighted logos with original designs or ensure all content is family-friendly. After making corrections, re-upload the revised image as a new decal for moderation. Patience and adherence to guidelines are key for successful re-submission.
Can I Change a Decal After It's Been Uploaded to Roblox?
Once a decal is uploaded and approved on Roblox, its image content is fixed. You cannot directly 'edit' or replace the image of an existing decal asset. If you need to modify a decal, you must edit the original image file externally using your preferred image editor, then upload the modified image as a completely new decal. This new decal will receive a unique Asset ID, which you will then use to replace the old decal's ID wherever it is applied within your Roblox Studio projects.
How Do I Apply My Approved Decal to a Part in Roblox Studio?
To apply your approved decal in Roblox Studio, open your game and select the part you wish to decorate. In the 'Explorer' window, right-click on the selected part, hover over 'Insert Object', and choose 'Decal'. With the newly inserted 'Decal' object selected under your part, navigate to its 'Properties' window. Locate the 'Texture' property and paste the Asset ID of your approved decal into this field. You can also adjust the 'Face' property to position the decal on a specific side of the part, bringing your custom design to life.
What Are Some Tips for Optimizing Decal Performance in My Roblox Game?
Optimizing decal performance is crucial for a smooth gaming experience. To achieve this, use the smallest possible image dimensions and file sizes for your decals without sacrificing visual quality, opting for efficient formats like PNG or optimized JPGs. Limit the total number of unique decals used in your game, especially large ones, as excessive decals can increase load times. For large games, enabling StreamingEnabled in Roblox Studio can help load assets dynamically. These practices ensure your customized game runs efficiently for all players, including those on mobile devices.
Are you a gamer who loves adding a personal touch to everything from your character to your in-game builds? Many US gamers, who balance demanding jobs and family life with their passion for gaming, understand the value of quick, impactful customization. With around 87% of gamers regularly engaging with their favorite titles and spending an average of 10+ hours a week, maximizing that precious gaming time with creative expression is key. Roblox, a platform where creativity knows no bounds, offers an excellent way to personalize your experiences through decals. But if you have ever wondered 'how to create decals on Roblox' efficiently and without hassle, you are in the right place. This guide is designed for you—the busy adult gamer looking for practical solutions and clear steps to enhance your virtual world without getting bogged down by technical jargon or endless trial and error. We will cut through the noise, providing you with actionable advice to bring your unique visions to life in Roblox.
Creating decals might seem daunting at first, but it is a straightforward process that allows you to upload any 2D image and use it within your Roblox games. Whether you want to add a custom logo to your racing car, a personalized painting to your virtual home, or a unique texture to a building, decals are your go-to. This article will walk you through every step, from preparing your image to applying it in Roblox Studio, ensuring your creations stand out. We will also tackle common issues like image moderation and optimal file types, so you can spend less time troubleshooting and more time enjoying your customized Roblox experience. Let's dive in and unlock the full potential of your Roblox creativity.
What Exactly Are Decals in Roblox?
Decals in Roblox are essentially 2D images that users can upload and apply to surfaces within their games and creations. Think of them as stickers or textures that can be wrapped around parts, giving objects a unique look. They are a fundamental tool for customization, allowing creators to add branding, artwork, signs, or detailed textures to their models. Unlike textures, which typically tile across a surface, decals are often used for specific graphical elements or single images on a part. This distinction is important for understanding how they integrate into your builds. For US gamers keen on expressing individuality or building immersive worlds, decals are indispensable.
Why Should I Use Decals in My Roblox Games?
Using decals brings a significant level of personalization and polish to your Roblox games, which is highly valued by players. For adult gamers who appreciate skill-building and detailed creations, decals offer a direct path to elevating your game's aesthetics and functionality. Here are a few key reasons:
- Visual Appeal: Decals allow you to add custom art, logos, or designs that enhance the overall look and feel of your game, making it more engaging and professional.
- Branding: If you are developing a unique game, decals can be used for in-game branding, promoting your game or a fictional company within your virtual world.
- Information: Display signs, maps, or instructional graphics directly on parts within your game, providing clear information to players.
- Immersion: Custom textures and details created with decals can make your game environments more realistic and immersive, drawing players deeper into the experience.
- Unique Creations: Stand out from the crowd by incorporating designs that are entirely your own, showcasing your artistic flair and creativity.
In a world where mobile gaming dominates and social interaction is key (many gamers use platforms like Discord alongside Roblox), unique visual elements foster stronger communities and more memorable experiences. Decals are a simple yet powerful way to achieve this.
What Image Formats and Sizes Does Roblox Support for Decals?
Understanding image requirements is crucial to avoid common setup issues and ensure your decals upload smoothly. Roblox supports several standard image formats, but there are recommendations for optimal performance and quality:
- Supported Formats: JPG, PNG, GIF, BMP, TGA.
- Recommended Format: PNG is generally preferred for its lossless compression and support for transparency, which is vital for many decal designs. JPG is good for photographic images without transparency.
- Size Guidelines: While Roblox does not have a strict maximum resolution for uploads, larger images will consume more data and may take longer to moderate or load in-game. A common practice is to use resolutions like 512x512 pixels or 1024x1024 pixels for square decals. Rectangular decals can vary, but generally staying within reasonable dimensions (e.g., 2048x1024) is advised. Keep file sizes manageable to ensure good performance, especially for players on mobile devices, which currently represent a significant portion of the Roblox user base.
Always aim for a balance between visual quality and file efficiency. This approach helps optimize game performance, a common concern for gamers who value a smooth experience.
How Do I Prepare My Image Before Uploading to Roblox?
Proper image preparation is key to a successful decal. This step ensures your image meets Roblox's guidelines and looks exactly how you intend in your game. Here's a simple checklist:
- Design Your Image: Use any image editing software (e.g., Photoshop, GIMP, Paint.NET, or even online tools) to create or edit your desired image.
- Resize and Crop: Ensure your image is a suitable resolution (e.g., 512x512 or 1024x1024 pixels) and cropped to remove any unnecessary borders or elements.
- Check for Transparency: If your decal needs transparent areas (e.g., a logo that will blend with the background), save it as a PNG file.
- Review Content: Make sure your image adheres to Roblox's Community Standards. This means no inappropriate content, copyrighted material you do not have rights to use, or personal information. Roblox's moderation system is robust, and adhering to guidelines prevents delays or rejections.
- Save Correctly: Save your image in a supported format (PNG or JPG recommended) with a clear, descriptive filename.
Taking these few minutes to prepare your image correctly can save you headaches later and get your decal approved faster, letting you get back to gaming with friends.
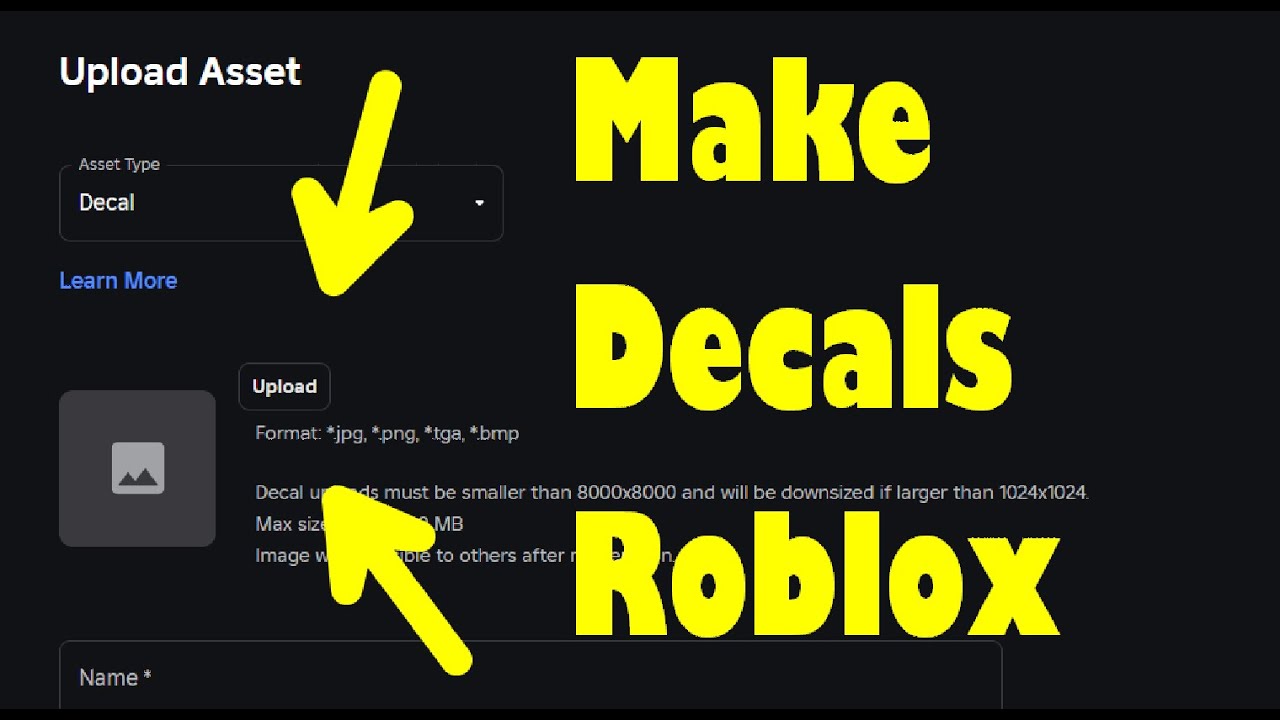
Step-by-Step: How to Upload a Decal to Roblox?
Uploading your prepared image to Roblox is a straightforward process. Follow these steps:
- Go to the Roblox Create Page: Open your web browser and navigate to the Roblox website. Log in to your account. Then, click on the 'Create' tab at the top of the page. This will take you to your Creator Dashboard.
- Navigate to Decals: On the Creator Dashboard, in the left-hand menu, look for 'Creations' and then select 'Decals'.
- Upload Your Image: You will see an 'Upload Image' button. Click on it.
- Choose Your File: A file browser will open. Select the image file you prepared earlier from your computer.
- Name Your Decal: Give your decal a descriptive name. This name will appear in your inventory and help you identify it later in Roblox Studio.
- Initiate Upload: Click the 'Upload' button. Your image will now be submitted to Roblox for moderation. This process can take anywhere from a few minutes to several hours, depending on system load.
Once approved, your decal will be available in your Roblox inventory under 'My Decals' and ready for use in your game creations. This process is consistent across PC and mobile browsers, catering to the significant portion of gamers who engage via mobile devices.
How Do I Apply My Decal to a Part in Roblox Studio?
After your decal is approved and uploaded, the real fun begins: applying it to your builds in Roblox Studio. This is where your personalization truly comes to life.
- Open Roblox Studio: Launch Roblox Studio and open the place (game) where you want to apply the decal.
- Insert a Part: If you do not already have one, insert a part (e.g., a Block) into your workspace. You can find this under the 'Model' tab or 'Home' tab in the toolbar.
- Select the Part: Click on the part in the workspace to select it.
- Open the Properties Window: Ensure the 'Properties' window is visible (View tab > Properties).
- Find the Decal Asset: In the 'Explorer' window (View tab > Explorer), select the part you wish to apply the decal to. Then, in the 'Properties' window for that part, locate the 'TextureID' property. You will need the Asset ID of your uploaded decal. You can find this by going back to the Roblox website, clicking 'Create' > 'Decals', and clicking on your approved decal. The ID will be in the URL (e.g., 'https://www.roblox.com/library/123456789/YourDecalName' where 123456789 is the ID). Copy this number.
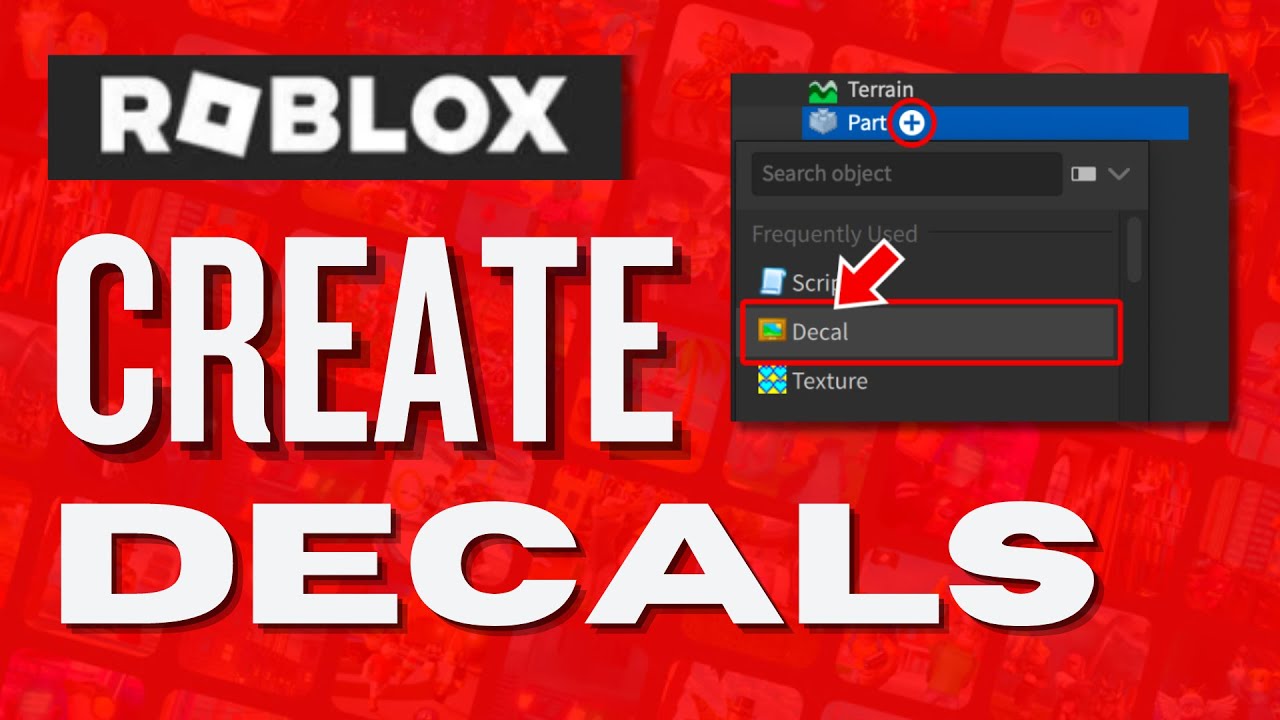
- Insert a Decal Object: Alternatively, and often easier, right-click on your selected part in the 'Explorer' window, hover over 'Insert Object', and search for 'Decal'. Click to insert it.
- Set the Decal's Properties: With the newly inserted 'Decal' object selected under your part in the 'Explorer', go to its 'Properties' window. Locate the 'Texture' property. Paste the Asset ID you copied earlier into this field.
- Adjust Face: You can also change the 'Face' property of the Decal object to specify which side of the part the decal appears on (e.g., Front, Back, Top, Bottom, Left, Right).
And there you have it! Your custom decal should now be visible on your part. Experiment with different faces and parts to get the desired effect.
What If My Decal Gets Rejected by Roblox Moderation?
Decal rejections can be frustrating, especially when you are trying to squeeze in some creative time between work and family. Roblox has strict community standards to ensure a safe environment for all players, and their moderation system is quite thorough. If your decal is rejected, it usually means it violated one of these rules. Common reasons include:
- Inappropriate Content: Nudity, violence, hate speech, or sexually suggestive material.
- Copyright Infringement: Using images, logos, or characters you do not have permission to use. Many gamers, especially those creating fan content, might inadvertently run into this.
- Personal Information: Any image containing real-world personal information.
- Bad Resolution or Quality: While less common for outright rejection, very blurry or unidentifiable images might be flagged.
- Exploits: Images that could be used to exploit bugs or loopholes in the platform.
If your decal is rejected, review the reasons provided by Roblox (if any) and carefully examine your image. Make necessary edits to comply with their guidelines and try uploading again. Remember, the goal is a safe and fun environment for everyone, a sentiment many adult gamers appreciate when seeking relaxation and social play.
Can I Edit or Update an Existing Decal on Roblox?
Once a decal is uploaded and approved, its image content is generally considered final. You cannot directly 'edit' the image file of an already uploaded decal asset. If you need to make changes to the image itself (e.g., correct a typo, change a color, or adjust a design), you will need to:
- Edit the Original Image: Make your desired changes in your image editing software.
- Upload as a New Decal: Upload the revised image as a completely new decal to Roblox. This will generate a new Asset ID.
- Update in Studio: Replace the old decal's Asset ID with the new one wherever it's used in your Roblox Studio projects.
This might seem like an extra step, but it ensures that all assets are tracked and moderated individually. It is a system designed for clarity and safety across the vast Roblox platform, where millions of assets are managed daily. Planning your decals carefully before initial upload can save you time in the long run.
How Can I Make My Decals Load Faster in Roblox Games?
Performance optimization is a key concern for many US gamers, especially those juggling multiple responsibilities. Slow-loading assets can detract from the experience. To ensure your decals load quickly and smoothly in your Roblox games:
- Optimize Image Size: Use the smallest possible dimensions and file sizes without sacrificing essential visual quality. Lower resolution images (e.g., 512x512) for smaller details or distant objects load much faster than 4K textures.
- Use Efficient Formats: PNG is generally good for transparency, but for images without transparency, a well-optimized JPG can have a smaller file size.
- Limit Decal Count: While decals are great, excessive use of unique decals, especially large ones, can increase game load times and memory usage. Be mindful of how many distinct decal assets your game requires.
- Consider Streaming Enabled: If your game is large, enabling StreamingEnabled in Roblox Studio (under Workspace properties) can help parts and assets load dynamically as players approach them, improving initial load times.
- Pre-load Assets: For critical decals, you can use scripting to pre-load them into memory using the ContentProvider service, ensuring they are ready when needed.
By keeping these tips in mind, you can create visually rich games without compromising on the smooth performance that gamers crave.
Are There Any Costs Associated with Uploading Decals?
For most users, uploading decals to Roblox is completely free. Roblox allows all users to upload images and audio files (within certain limits) without requiring Robux. This makes custom decals an accessible creative tool for everyone, from casual players to dedicated developers. The only 'cost' is your time and creativity. This budget-friendly approach aligns perfectly with the needs of gamers who are keen on value for money and getting the most out of free-to-play platforms. So feel free to experiment and upload as many unique designs as you like to enhance your Roblox universe.
Conclusion
Mastering the art of creating and applying decals in Roblox is a fantastic way to personalize your gaming experience, express your creativity, and make your virtual worlds truly your own. For US gamers who love diving into engaging titles but need to balance gaming with life, this guide offers a clear, no-nonsense path to custom decals. We have covered everything from image preparation and upload protocols to troubleshooting moderation issues and optimizing performance. By following these steps, you can confidently add unique flair to your builds, enhance immersion, and contribute to the vibrant creator community that makes Roblox so special.
Remember, the power of customization is in your hands. Experiment with different designs, tell your unique stories through visuals, and transform your Roblox adventures. What's your biggest gaming challenge when it comes to customizing your experience? Comment below and let us know!
FAQ Section
How do I make a decal transparent on Roblox?
To make a decal transparent, you need to save your image file in a format that supports transparency, such as PNG. When creating your image in an editing program, ensure the background or specific areas are set to be transparent. Uploading this PNG file to Roblox will preserve its transparency, allowing it to blend seamlessly with the part it is applied to in Roblox Studio. Always double-check your image editor's export settings to ensure transparency is enabled.
Can I use copyrighted images for my Roblox decals?
No, you should not use copyrighted images for your Roblox decals without explicit permission from the copyright holder. Roblox has strict moderation policies against intellectual property infringement. Using copyrighted material without authorization can lead to your decal being rejected, removed, or even result in action taken against your account. Always use images you have created yourself, are licensed to use, or are in the public domain to ensure compliance and avoid issues.
What is the difference between a decal and a texture in Roblox?
While both decals and textures apply images to surfaces, their primary use cases differ. A decal is typically a single, non-tiling image applied to a specific face of a part, often for logos, signs, or unique illustrations. A texture, however, is an image designed to tile seamlessly across a surface, covering it entirely to create patterns, materials (like wood or brick), or environmental details. You can apply a texture to a part via its 'Texture' property, while a decal is an object inserted into a part with its own 'Texture' property for a single image application.
Do Roblox decals cost Robux to upload?
No, uploading decals to Roblox does not cost Robux for most users. Roblox allows users to upload images for free, making it an accessible feature for all creators to customize their games and items. This policy ensures that creative expression is open to everyone, regardless of their Robux balance. You only need a Roblox account and your prepared image file to get started.
How long does Roblox decal moderation take?
The moderation time for Roblox decals can vary. It typically ranges from a few minutes to several hours, sometimes longer during peak times or for images that require closer review. Roblox employs both automated and human moderation to ensure all uploaded content adheres to its community standards. While waiting, you cannot use the decal in your game. It's a system designed to keep the platform safe and appropriate for its diverse user base, including younger players and families.
Can I use animated GIFs as Roblox decals?
No, Roblox decals do not support animated GIFs. While you can upload a GIF file, it will be treated as a static image, displaying only the first frame of the animation. If you wish to incorporate animation into your Roblox creations, you would typically achieve this through scripting, sprite sheets combined with textures, or other game development techniques, rather than relying on animated decals directly. Decals are specifically for static 2D images.
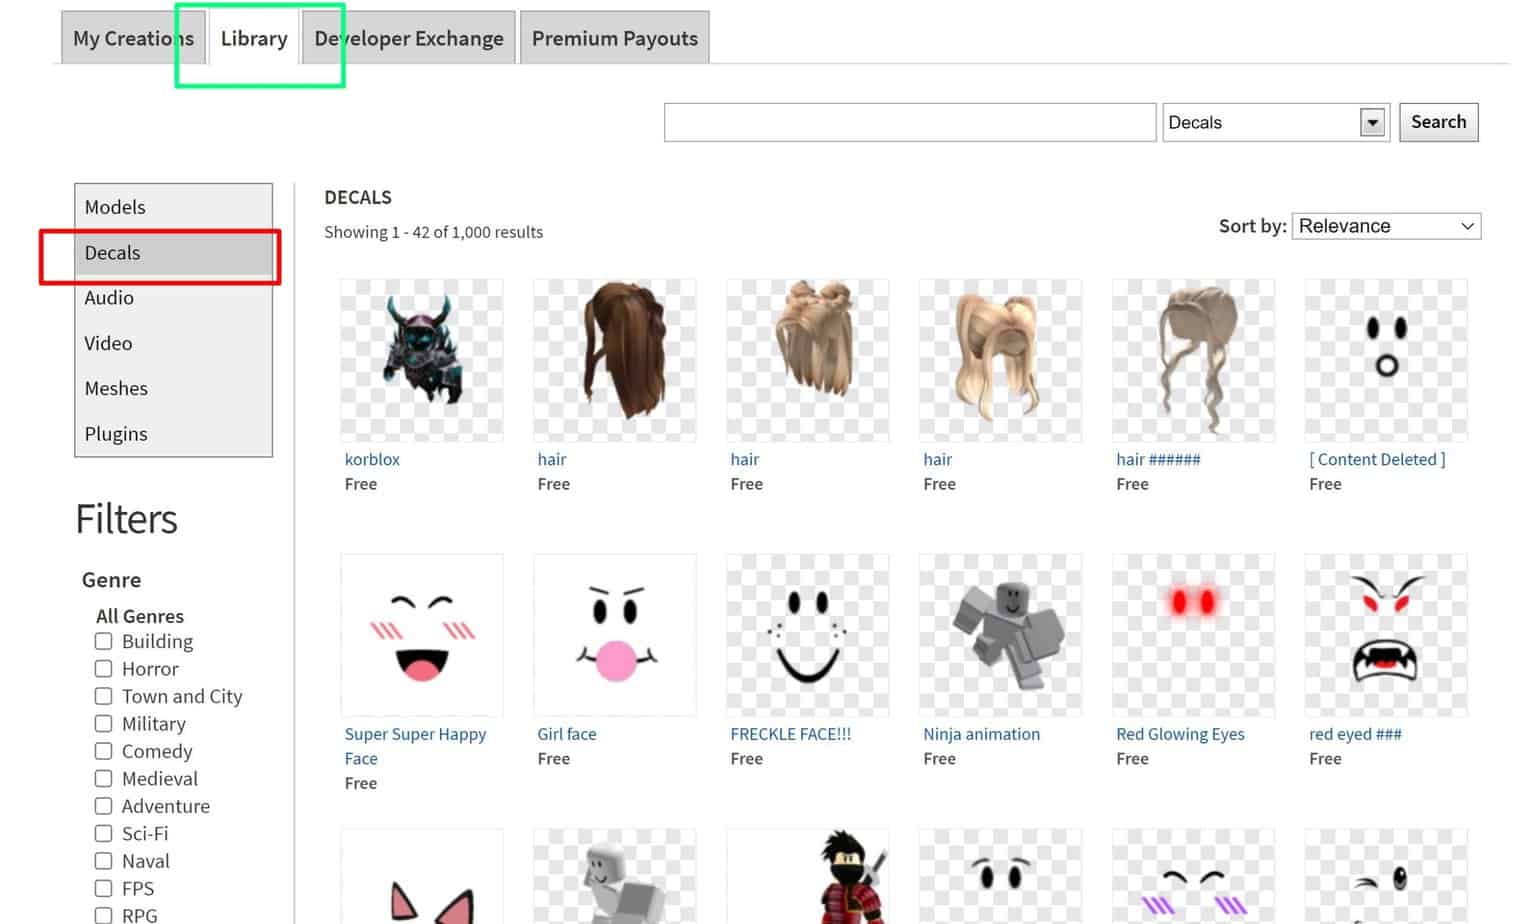
Where can I find free images to use for Roblox decals?
You can find free images for Roblox decals from several sources, ensuring you respect licensing. Websites like Pexels, Unsplash, and Pixabay offer high-quality, royalty-free stock photos and illustrations under licenses that typically permit commercial and personal use without attribution, or with minimal attribution. Be sure to check the specific license for each image. Alternatively, you can create your own original artwork using free design software, guaranteeing full ownership and compliance with Roblox's content policies. Always avoid copyrighted material to prevent moderation issues.
Easy decal creation process, Step by step Roblox upload guide, Image moderation tips, Applying decals to models, Personalizing Roblox builds, Understanding Roblox image requirements, Quick creative customization.
35


How To Make Decals In Roblox Full Guide YouTube . How To Create Decals In Roblox Easy Method 2024 YouTube . How To Make A Decal On Roblox Roblox Create Decals YouTube . How To Put On Decals In Roblox At Rita Magno Blog . How To Put Decals On Your Roblox Avatar Sddefault


How To Make A Decal Roblox Tutorial YouTube . How To Make Decals In Roblox YouTube . How To Make Decals In Roblox Full Guide YouTube . How To Use Decals In Roblox Screenshot 72 300x232 . How To Create Decals Using Roblox Mobile Quick Easy YouTube


How To Make Decals In Roblox 2026 YouTube . How To Make Decals In Roblox YouTube . How To Use Decals In Roblox Screenshot 62 1 1 562x320 . Roblox Decals And Image ID Codes Guide Library Decals Scaled . How To Make Decals In Roblox Quick Tutorial YouTube


How To Make And Upload Decals In Roblox Mobile Or PC Roblox Studio . Roblox Studio Tutorial How To Upload Your Own Decals On Roblox YouTube . How To Put Decals On Your Roblox Avatar . How To Create Decals In Roblox Easy And Simple YouTube . How To Make Decals In Roblox For Beginners YouTube


How To Make Your Own DECAL In ROBLOX YouTube . How To Use Decals In Roblox Screenshot 80 300x232 . How To Put On Decals In Roblox At Rita Magno Blog . How To Create A Decal In Roblox 2020 Roblox Tutorial YouTube . How To Make DECALS In The Chosen One Roblox 2026 YouTube


How To Make Decals On Roblox Apps Roblox.PNG. HOW TO MAKE DECALS ON ROBLOX YouTube . How To Make Decals In Roblox Full Guide YouTube . How To Upload USE Decals In Roblox EASY Tutorial WORKING 2026 . Best 13 HOW TO MAKE DECALS ON ROBLOX Artofit


How To Make A Decal In Roblox Full Guide YouTube . How To Make Decals On Roblox Distribute On Creator Store YouTube . Flipped Decals Fixing Roblox Studio Woes . How To Make Decals On Roblox Mobile 2022 YouTube . How To Make Decals On Roblox 2025 IOS ONLY IPhone Wired 1745077203